
The basic needs of wildlife: food, water, space and cover. We all ponder how to provide these on our small forest lands?
Food is based on plant diversity, which can feed herbivores of various types, which in turn feed carnivores. Water is from creeks, puddles, ponds or simply vegetation. Space, well, they work out their territories.
And, finally, there is cover: a critical place for animals to rest and raise their young, and a place to escape from predators and save energy for the next effort at survival. Different wildlife species use many types of cover according to their size and life histories. These can include terrain features, such as ridgelines to break the wind, rocky outcrops, tall grass, hollow trees, dense brush, logs and accumulations of vegetative material in thickets. These occur in nature but we also can manipulate these features to benefit wildlife.
In nature, a blown-down tree can be a cover oasis for many critters; down logs a home for many, many decades. These natural concentrations of down and near-ground dead wood are a boon for wildlife.
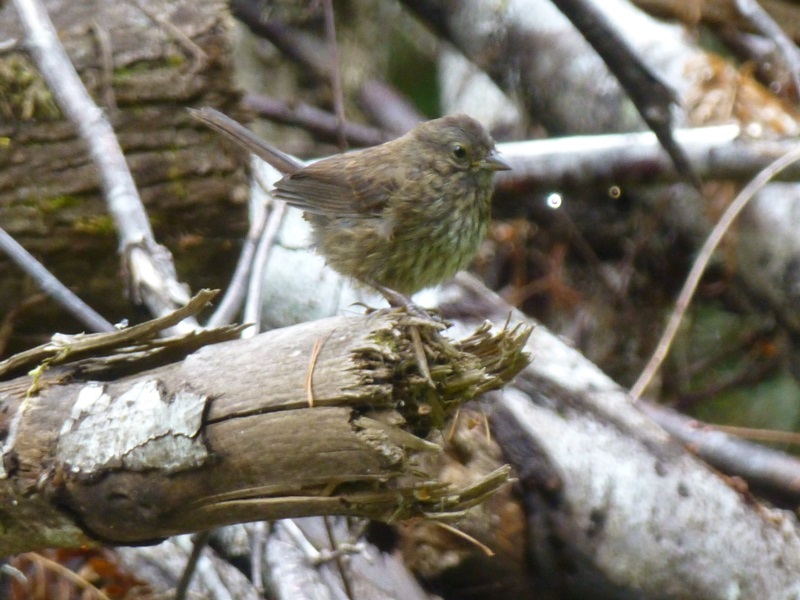
Many species are naturally associated with down wood and branchy habitats on the ground. Numerous small mammals such as voles, chipmunks, squirrels will use down wood and piles. Their predators show up — long tailed weasels, marten and fisher — and use this material both for cover and as a hunting ground. Amphibians and reptiles, salamanders, lizards and snakes, will live in and around down wood as it provides similar benefits. Many birds will use these woody sanctuaries for cover and nest alongside down logs and under piles of branches on the ground. Bears and cougars cuddle up to down wood and rest in thickets.
In managing forest land, we often generate large quantities of loose woody material; slash, in other words. The enormous volume of woody branches and trees stem pieces that present a disposal dilemma to landowners and managers also represents a rich, and routinely overlooked, opportunity for wildlife habitat enhancement. This material can be consolidated and provide much needed cover in a managed forest setting.
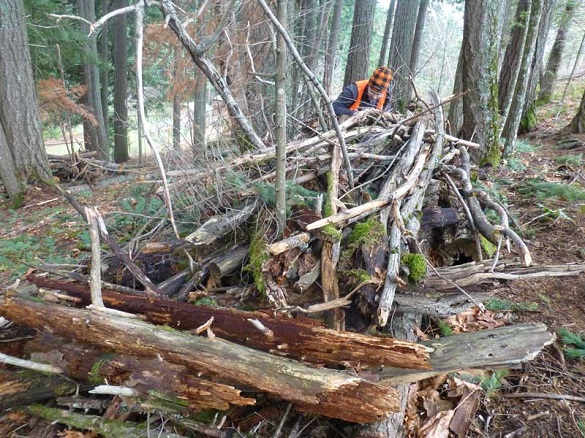
Build a pile
Can we mimic this habitat feature on our small woodlands? Absolutely! One particular wildlife friendly landowner in Northwest Washington said to me after I had expressed admiration for her numerous piles, “The quickest thing you can do to benefit the most species of wildlife is build a pile.” I think she is correct.
And there are some best practices for building these piles, but first, some terminology for what I like to call “habitat piles.”
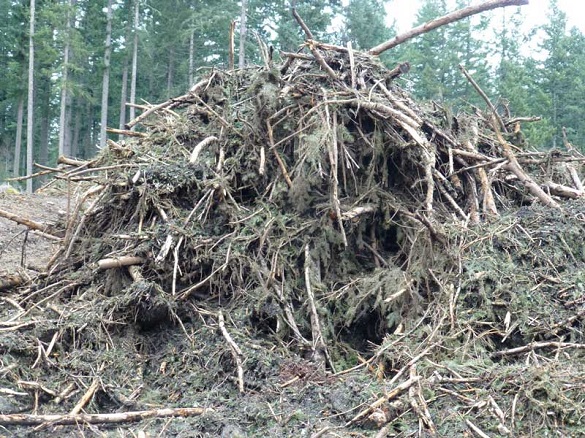
Slash Pile – Unconsolidated logging debris, usually piled with a large machine and often in very large concentrations, thanks to today’s mechanized logging operations. Often burned, leaving a large sterilized patch of earth, (at least in the short term). If simply left alone, a slash pile can become a valuable habitat feature over the long term.
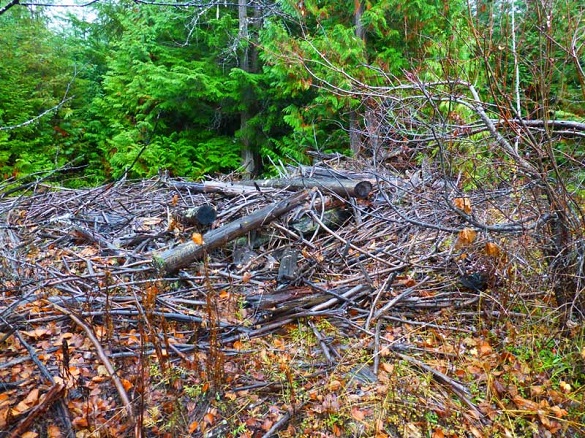
Brush Pile – Small diameter branches and shrub cuttings piled into a dense mass. Although often burned by landowners, an intact brush pile will provide good habitat for a few years. As decay works on the material, brush piles tend to collapse and all interstitial space is lost in a relatively short time, thus reducing the habitat value for many types of wildlife.
Habitat Pile – A deliberately constructed edifice, often using materials produced by land management activities. A habitat pile uses design criteria to optimize wildlife use and assure longer term viability of the habitat structure. Deliberately located, constructed and maintained over time.
Any pile can be good habitat for a period of time. Old slash piles often have considerable evidence of wildlife use. Leave them when you can. And I always encourage landowners to create some piles and maintain them.
Guidelines for piles
Here are a few best practices to build piles that attract and support desirable wildlife:
Quantity: As a target, I suggest two piles per acre, about 100 feet apart, preferably in clusters of three to allow birds and small mammals to live in more than one pile. In dry country where fire is a concern, make sure the piles are not placed under trees where they could act as ladder fuels for fire.
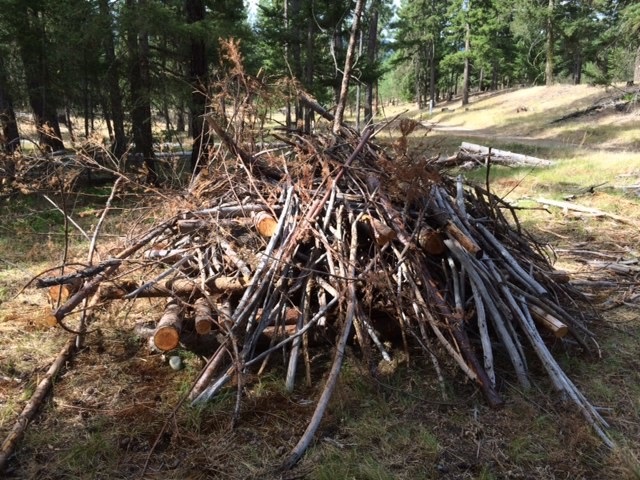
Design: The goal is to create a long-lived structure with internal openings for wildlife to use. Therefore, larger material goes into the lowest layers forming the base while smaller material (such as small branches) goes over the top. You’ll also want the pile deep enough so provide wildlife secure cover in the middle of the pile.
Wood suspended above the ground dries out and rots more slowly than wood touching the moist ground so look for creative solutions, such as building around a log, stump, rock pile or other base structure (get creative and try using cinderblocks or other materials). This will provide a basis for the hollow core of the structure and help these spaces persist for a longer time as the wood decays.
If using small diameter logs from a tree thinning, place them in several triangular-shaped piles next to each other so as to create a tunnel-like structure (chipmunks love this). Use these piles as the base and proceed to put criss-crossing layers at least 3-5 deep above the base. More layers are better. Neatness is not necessary.
Top the structure with layers of fine branches at least 18” deep, or 6-10 layers. Green branches are generally ok, with one exception. Avoid using green ponderosa pine boughs between January and August to avoid creating a breeding ground for ips bark beetles. If you have larger stems, try to dry them out as much as possible before creating your pile. Once the pile is dry and established, risk from “bad bugs” is gone.
Here is some wisdom from our own Glen Kohler, DNR bug expert extraordinaire:
“Bark beetles feed and breed in the inner bark layer (phloem). They prefer dead material like slash and downed trees because it is not defended by pitch and it produces more offspring. There are a few bark beetles like Ips pine engravers and Douglas-fir beetle that are notorious for building up damaging outbreaks in freshly killed branches and trees. Fortunately, green branches and downed trees are only useful to them for one season because they can’t survive in dry phloem. Pine material over 3” diameter pose a risk for outbreaks of Ips pine engravers in eastern Washington. Smaller branches cut or broken from August through December will likely dry before beetles fly in spring.
Large pine stems will not dry in a few months, so are still a risk. Anything to speed drying like cutting into firewood lengths or bark removal will reduce risk. Avoid leaving green pine boughs between January and July. There are no aggressive bark beetle species that builds up damaging populations in dead non-pine conifers under 8” diameter.”
So using green ponderosa pine logs can potentially create a reservoir for bark beetles, but this doesn’t always happen. If there are already beetles apparent in the local and adjacent stands, this risk is higher. Often, with great quantities of thinning material, it is a risk landowners are willing to take.
Working strictly by hand, make the piles 12 to 15-feet in diameter and 6 to 8-feet high, with enough material to provide a core that has openings for small animals to use for cover. This size can be constructed by hand, and will optimize the “edge effect” of the pile. Larger piles are excellent, and if you have access to a machine, make them 20-feet by 20’ and 10’ high, but still using the same principles of larger material in the core.
On mechanized logging landings, ask your contractor to put aside a separate pile of larger woody pieces for you to use later. (This is also a great source of firewood so you don’t have to look to your snags — also great for wildlife habitat — for fuel.)
Smaller piles are fine, too. Consolidating branches into dense little teepees around stumps and logs can provide some cover for some small animal.
Habitat piles can work very well with thinning regimes. Contractors can be directed to create and leave some piles with the material they are disposing of anyway. We help many landowners who have overstocked, dense stands of timber that wonder what to do with all the material produced by their thinning projects. Saving a few of these piles, but burning, chipping or scattering the rest, is a good way to enhance wildlife habitat while accomplishing the objectives of the thinning.
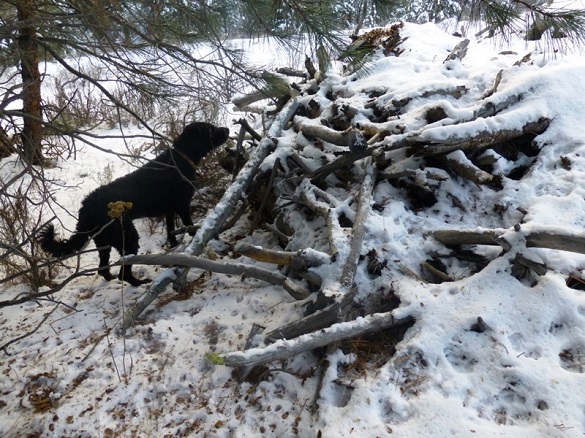
I have heard anecdotes about cougars leaping out of piles being worked, turkeys nesting in them, lots of squirrel cone caches and lots of perching songbirds. Send me your stories and photos of what you saw in your habitat pile.
Habitat piles are a great tool for providing homes for many small wildlife species on your woodlands.
By Ken Bevis, Stewardship Wildlife Biologist, Washington State Department Natural Resources.
For more information, to tell Ken a pile/critter story, or to schedule a Stewardship visit to your property, please contact him at: Ken.Bevis@dnr.wa.gov or call him at (360) 489-4802
